How To Finish The Toe Kick Kitchen Cabinets - Adding a Cabinet Toe Kick - Sawdust Girl® / The toe kick is very easy to assemble, as the clips on the back are designed to attach to each leg, making it particularly easy to take off if the homeowner wanted to clean underneath the cabinets.
How To Finish The Toe Kick Kitchen Cabinets - Adding a Cabinet Toe Kick - Sawdust Girl® / The toe kick is very easy to assemble, as the clips on the back are designed to attach to each leg, making it particularly easy to take off if the homeowner wanted to clean underneath the cabinets.. Most cabinet manufacturers will make matching toe kicks, but if they don't, you can create your own pretty simply. One thing you should note if you want to try this style is this style might only match with kitchen on dominant plain colors. A compound miter saw takes care of that in a minute or two. As with many other standard features of home and furniture design, the toe kick follows a fairly common measurement standard. Most cabinets already come with toekicks.
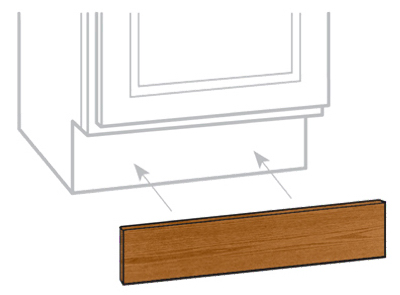
Adding a toe kick cabinet base will give your kitchen a professional and polished look. You want the tape on the floor to be directly beneath the cabinet toe kick, but not under it. Paint your cabinet toe kick with bright and shining color to cheer your kitchen. It also serves to protect the cabinet bases from damage from dropped objects, spilled food and liquids and, well, kicks from people's toes. The toe kick is made with a laminate that has a medium oak finish.
Standard Plumbing Supply - Product: Continental Cabinets Kitchen Cabinet Toe Kick, Medium Oak ... from cdn.spsmsys.com Cabinet toe kick installation to a floor that is at least an inch off. Yellow or blue can be the right color if you want to apply colorful toe kick. Toe kick is the molding used at the bottom of the cabinet to cover up cabinet seems and match the finish of the cabinets. We cut the toe kicks to the proper width on our miter saw, and then we used the ikea provided clips that slide into a groove along the back. Cut the toe kick laying flat on the miter saw with the finished side up. Most cabinets already come with toekicks. Strike the nail setter with the hammer to countersink each finishing nail. This is both important for functionality and having a clean design.
You want the tape on the floor to be directly beneath the cabinet toe kick, but not under it.
Position a nail setter on the head of each finishing nail. Toe kick also provides a less maintenance and aesthetically pleasing approach to finishing the kitchen because it will block any leaves or other. As with many other standard features of home and furniture design, the toe kick follows a fairly common measurement standard. Installers are very familiar with toekicks. A compound miter saw takes care of that in a minute or two. The furring strip butted up to the back of the toe kick and was as long as the toe kick's depth. You will need to get accurate measurements. Use care when removing the toe kick board so you do not scratch the floor with the board or retaining brad nails. Loosen the toe kick board across its length. Toe kick molding covers the toe space of the cabinets to cover the exposed wood and allows your feet to stand closer to your workspace. This is both important for functionality and having a clean design. You want the tape on the floor to be directly beneath the cabinet toe kick, but not under it. Finally, fasten your toe kick with velcro, stickies, or nails to the current toe kick.
To do this, we measured the depth of the toe kick and cut pieces of 1 x 2 furring strip to size. Cabinet toe kick installation to a floor that is at least an inch off. In this episode the kitchen cabinet guy discusses options to embellish the toe kick area of kitchen cabinetry. We cut the toe kicks to the proper width on our miter saw, and then we used the ikea provided clips that slide into a groove along the back. A discussion about returning toe kick at the end of a cabinet run with some side discussion regarding squaring of the toe notch itself.
Like the feet under the cabinet | Kitchen cabinets with legs, Kitchen cabinet trends, Kitchen ... from i.pinimg.com Loosen the toe kick board across its length. This is both important for functionality and having a clean design. Toe kick also provides a less maintenance and aesthetically pleasing approach to finishing the kitchen because it will block any leaves or other. The toe kick is very easy to assemble, as the clips on the back are designed to attach to each leg, making it particularly easy to take off if the homeowner wanted to clean underneath the cabinets. Deduct 1/8 inch for the necessary clearance for moisture. Strike the nail setter with the hammer to countersink each finishing. Due to the length of this item, additional shipping fees may be applied if ordered alone or as part of a small order less than $1,000. Toe kick molding covers the toe space of the cabinets to cover the exposed wood and allows your feet to stand closer to your workspace.
As with many other standard features of home and furniture design, the toe kick follows a fairly common measurement standard.
Toe kick molding covers the toe space of the cabinets to cover the exposed wood and allows your feet to stand closer to your workspace. The exposed end is mitered 45 degrees and another small piece of the toe kick also mitered 45 degrees is glued on. It also serves to protect the cabinet bases from damage from dropped objects, spilled food and liquids and, well, kicks from people's toes. This would normally be handled by doing what is called a finished return. And keep just a hair of cabinet toe kick showing for the top tape line. Cabinet toe kick installation to a floor that is at least an inch off. When the stain is dry, spray the board with a single coat of clear finish. Here's what you need to know. As with many other standard features of home and furniture design, the toe kick follows a fairly common measurement standard. As apartment therapy explains, the toe kick is a helpful ergonomic detail that prevents you from having to lean over awkwardly while you work at your countertop. One thing you should note if you want to try this style is this style might only match with kitchen on dominant plain colors. It looks like the kick piece will have to be recessed on the profile depth in order to add a trim piece and maintain the alignment of the corner of the cabinet. You can either use the same wood as the rest of your cabinets or use a color or material that pops against the rest.
If toe kick is water damaged you will need to replace it.if just no finished edge you could glue laminate on it or use specialty cabinet trim piece to cover. It is far from water proof as you can see from the warpage. Strike the nail setter with the hammer to countersink each finishing. Toe kick is the molding used at the bottom of the cabinet to cover up cabinet seems and match the finish of the cabinets. This would normally be handled by doing what is called a finished return.
Pin by Weesie Gee on Kitchens | Kitchen cabinets toe kick, Kitchen cabinets without toe kick ... from i.pinimg.com The toe kick is the little cove beneath your cabinets that, like its name suggests, houses your toes. Most cabinet manufacturers will make matching toe kicks, but if they don't, you can create your own pretty simply. This is both important for functionality and having a clean design. In this episode the kitchen cabinet guy discusses options to embellish the toe kick area of kitchen cabinetry. As with many other standard features of home and furniture design, the toe kick follows a fairly common measurement standard. Position a nail setter on the head of each finishing nail. A compound miter saw takes care of that in a minute or two. Turn the pry bar over and use the curved end of the pry bar to pull the toe kick completely away from the cabinet frame.
Installers are very familiar with toekicks.
Finally, we could finish up with the toe kicks! Most cabinet manufacturers will make matching toe kicks, but if they don't, you can create your own pretty simply. Paint your cabinet toe kick with bright and shining color to cheer your kitchen. Nail the toe kick board to the base cabinets with finishing nails. As apartment therapy explains, the toe kick is a helpful ergonomic detail that prevents you from having to lean over awkwardly while you work at your countertop. Use care when removing the toe kick board so you do not scratch the floor with the board or retaining brad nails. You can either use the same wood as the rest of your cabinets or use a color or material that pops against the rest. Paint your toe kick panels using glidden paint's onyx black. We used an air nailer to secure these to the ground every 10 inches or so. October 11, 2020 at 8:56 pm best bet is to either order the cabinets deeper, order them with a flush toe kick and then put the register in the flush toe or move the duct backward into the footprint of a standard base cabinet. Cut the toe kick laying flat on the miter saw with the finished side up. We cut the toe kicks to the proper width on our miter saw, and then we used the ikea provided clips that slide into a groove along the back. Turn the pry bar over and use the curved end of the pry bar to pull the toe kick completely away from the cabinet frame.